

MCP Servers
Build a remote MCP server connected to your data in just 3 steps.
Step 1. Connecting OAuth Provider
Section titled “Step 1. Connecting OAuth Provider”We support popular OAuth providers including Auth0, PropelAuth, and Clerk for secure authentication with your MCP server.
Configuration Requirements
Section titled “Configuration Requirements”To connect your OAuth provider, you’ll need to provide the following credentials:
OAuth Client ID
Section titled “OAuth Client ID”The public identifier from your OAuth application configuration. This is used to identify your application to the OAuth provider.
OAuth Client Secret
Section titled “OAuth Client Secret”The secret credential your OAuth application uses when exchanging tokens. Keep this secure and never expose it in client-side code.
OAuth Authentication URL
Section titled “OAuth Authentication URL”The OAuth authorization URL for your provider. This is where users are redirected to authenticate with your chosen provider.
Step 2. Creating Data Scoped Tenants
Section titled “Step 2. Creating Data Scoped Tenants”After configuring your OAuth provider, you’ll need to create tenants with appropriate data permissions. This ensures that only date relevant to the tenant as defined by you is available to them.
You can do this either through the frontend interface or programmatically using the API.
Using the Frontend
Section titled “Using the Frontend”Navigate to the MCP section in your dashboard to create and configure tenants with specific data access permissions.
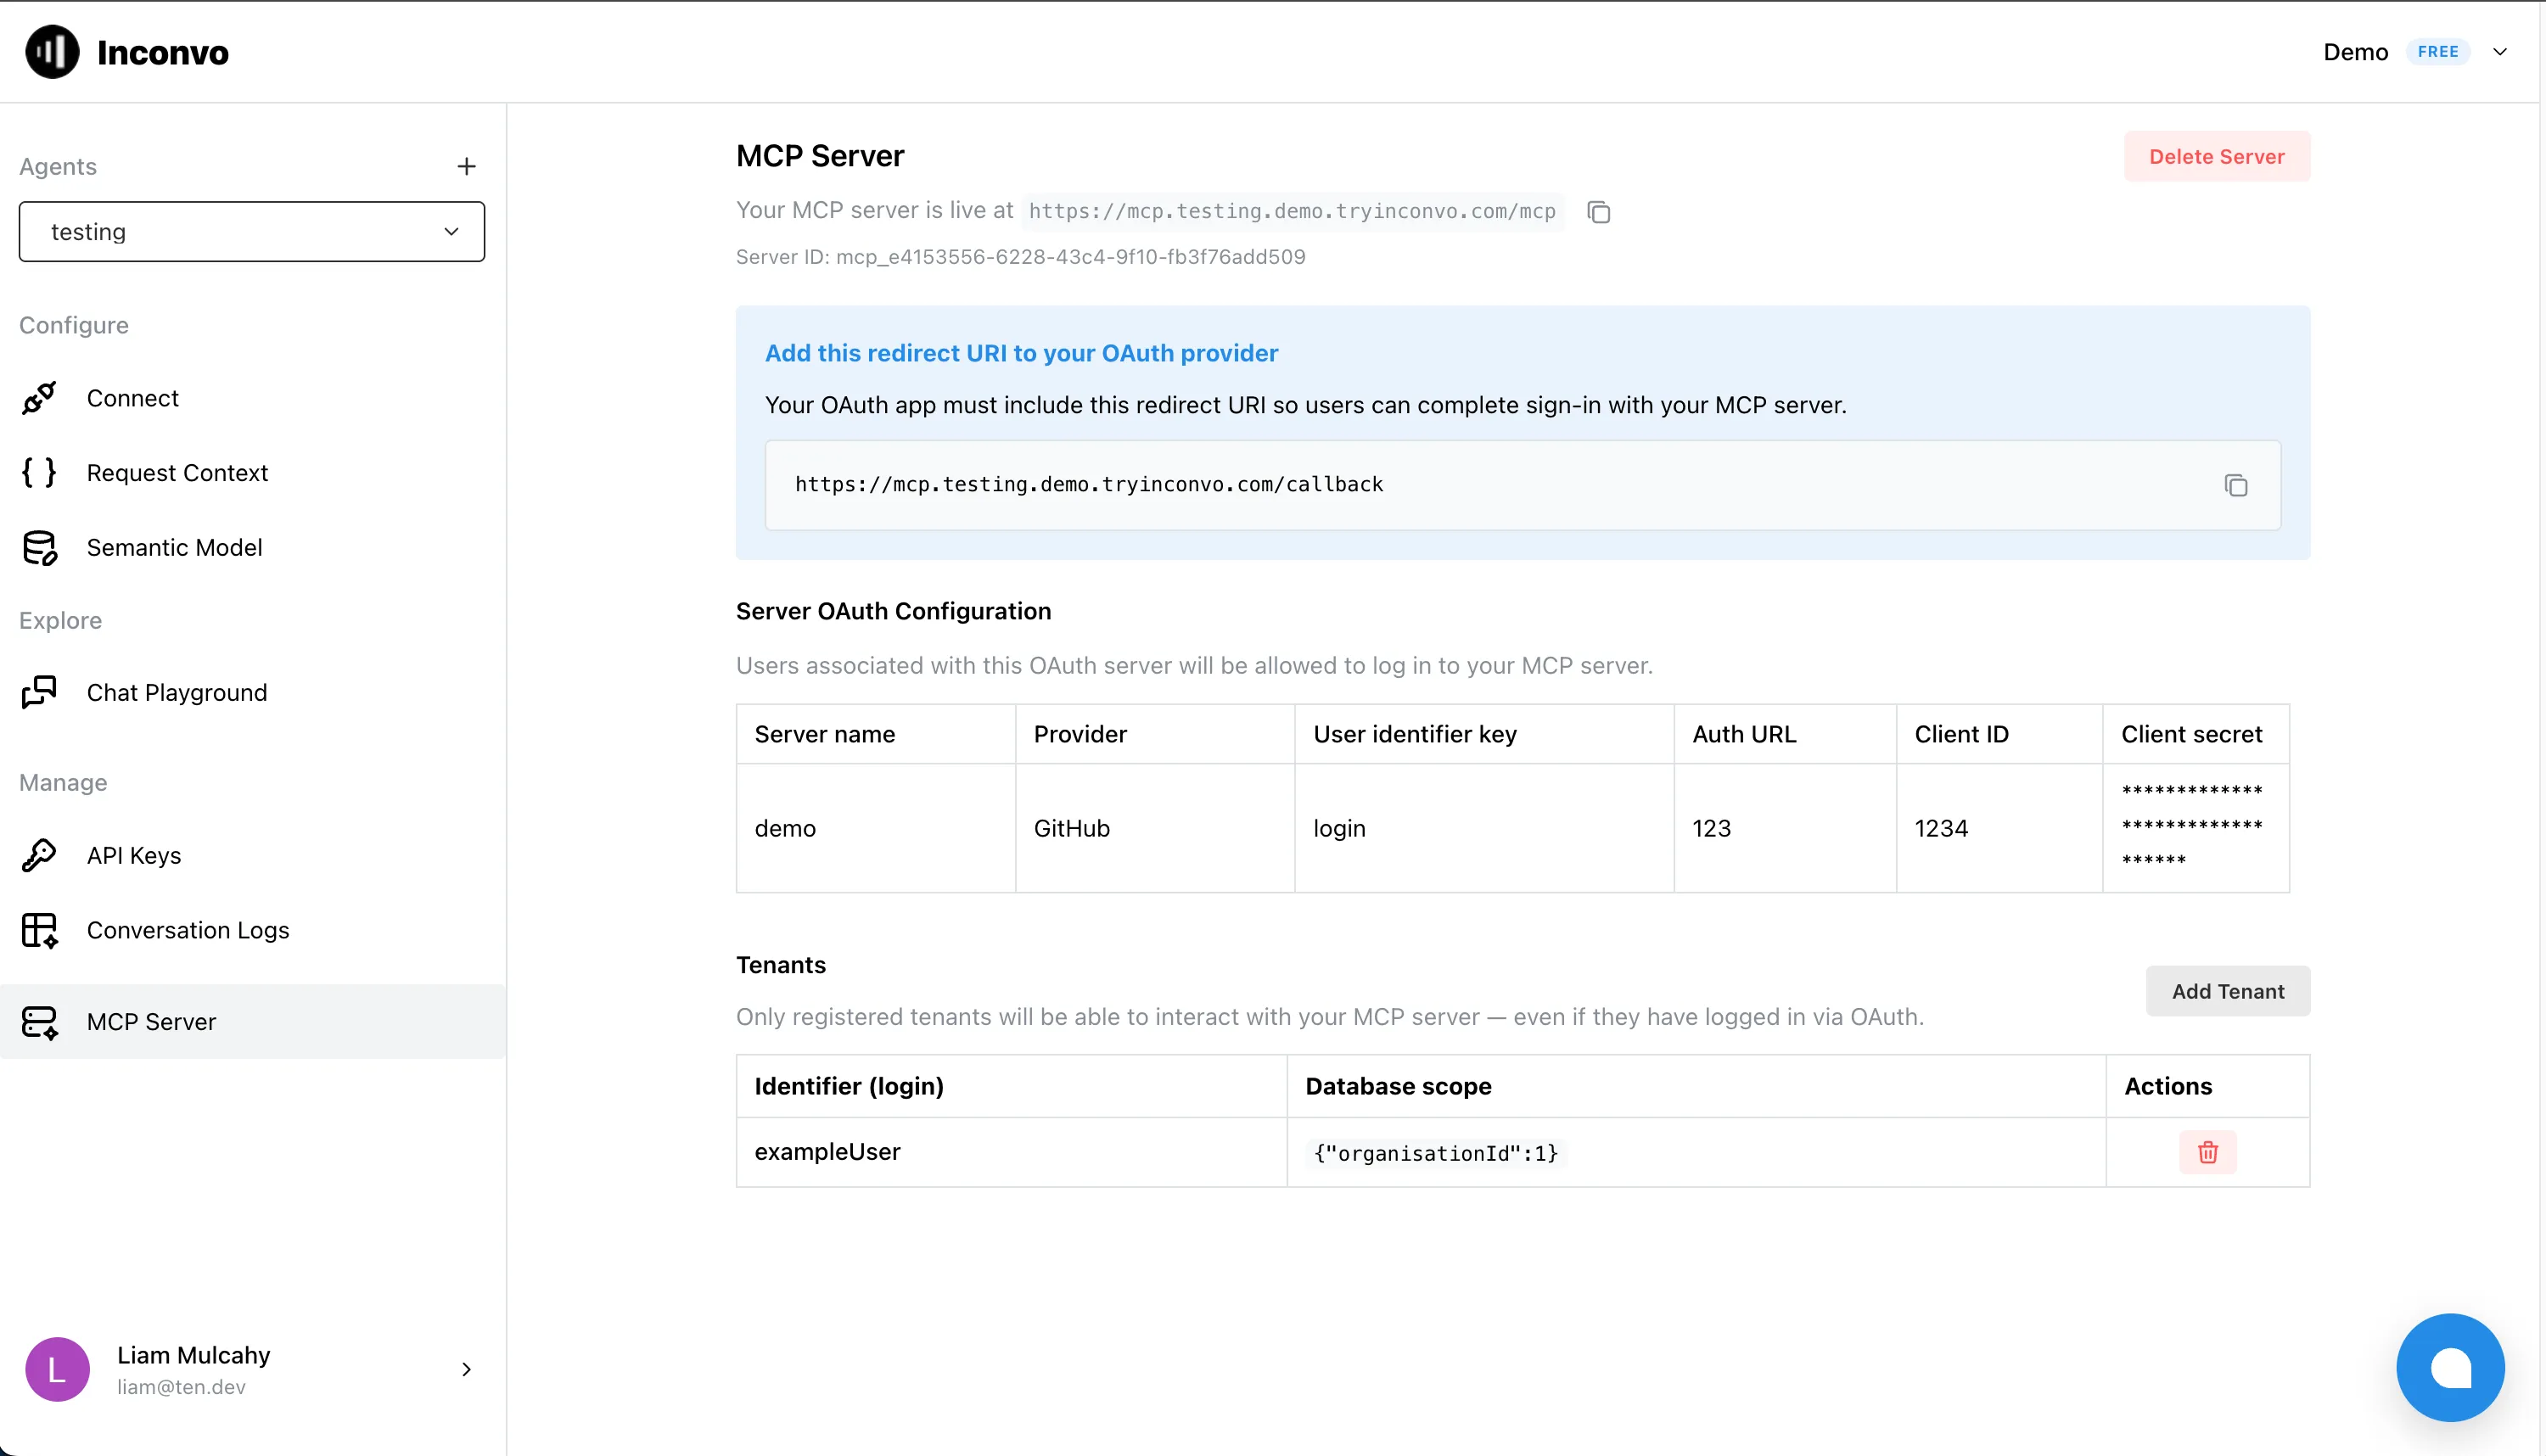
Using the API
Section titled “Using the API”Alternatively, you can create tenants programmatically. Each tenant maps a user identifier (typically an email from your OAuth provider) to a userContext that scopes their data access.
import Inconvo from "@inconvoai/node";
const inconvo = new Inconvo({  apiKey: process.env.INCONVO_API_KEY,});
const tenant = await inconvo.agents.mcpServers.tenants.create( "mcp_abc123", { agentId: "agt_123", tenant: { "user@example.com": { organisationId: 1, }, }, },);curl -X POST "https://app.inconvo.ai/api/v1/agents/agt_123/mcpservers/mcp_abc123/tenants" \ -H "Authorization: Bearer $INCONVO_API_KEY" \ -H "Content-Type: application/json" \ -d '{ "user@example.com": { "organisationId": 1 } }'See the Create tenant API reference for full details.
Step 3. Confirm Details and Launch
Section titled “Step 3. Confirm Details and Launch”Once you’ve configured your OAuth provider and set up your tenants with appropriate data permissions, you’re ready to launch your MCP server. Review your configuration to ensure all details are correct before going live.
Step 4. Connect from an MCP Client
Section titled “Step 4. Connect from an MCP Client”Once your MCP server is live, you can connect to it from any MCP-compatible client.